
| Related Topics: | ||
If you have reporting needs that are not met by the standard reports included with Lambda Predict, you can create your own custom report templates (which are saved as *.lp9r files). These report templates can be selected from the list of available report forms in the Select Report window when you want to create a report for a particular analysis.
To open the Report Templates window, choose Home > Templates > Report Templates.
![]()
You can also click the Add or Edit icons in the Select Report window.
![]() or
or ![]()
Regardless of how you opened the Report Templates window, the Ribbon always provides the following commands so you can create or edit any report template without closing and re-opening the window.
![]() New resets the interface so you can build a new template. Remember that the *.lp9r file is not created until you save the template.
New resets the interface so you can build a new template. Remember that the *.lp9r file is not created until you save the template.
![]() Load allows you to open an existing *.lp9r file and view/modify the settings. Remember that the file does not get updated until you save the changes.
Load allows you to open an existing *.lp9r file and view/modify the settings. Remember that the file does not get updated until you save the changes.
![]() Save and
Save and ![]() Save As allow you to save the template that is currently being edited.
Save As allow you to save the template that is currently being edited.
Each report template is associated with a prediction standard. This determines which data fields are applicable. If you have opened the Report Templates window while building a report for a particular standard item, that prediction standard will be selected by default on the Body page of the control panel. If you are creating a new template, or if you have no fields that are currently selected on the Body tab, you will be able to change the selection.
At any time, you can use the Preview tab to see how the settings that are defined for the current template will look when the report is generated. This is an approximate preview and uses placeholders in lieu of actual data.
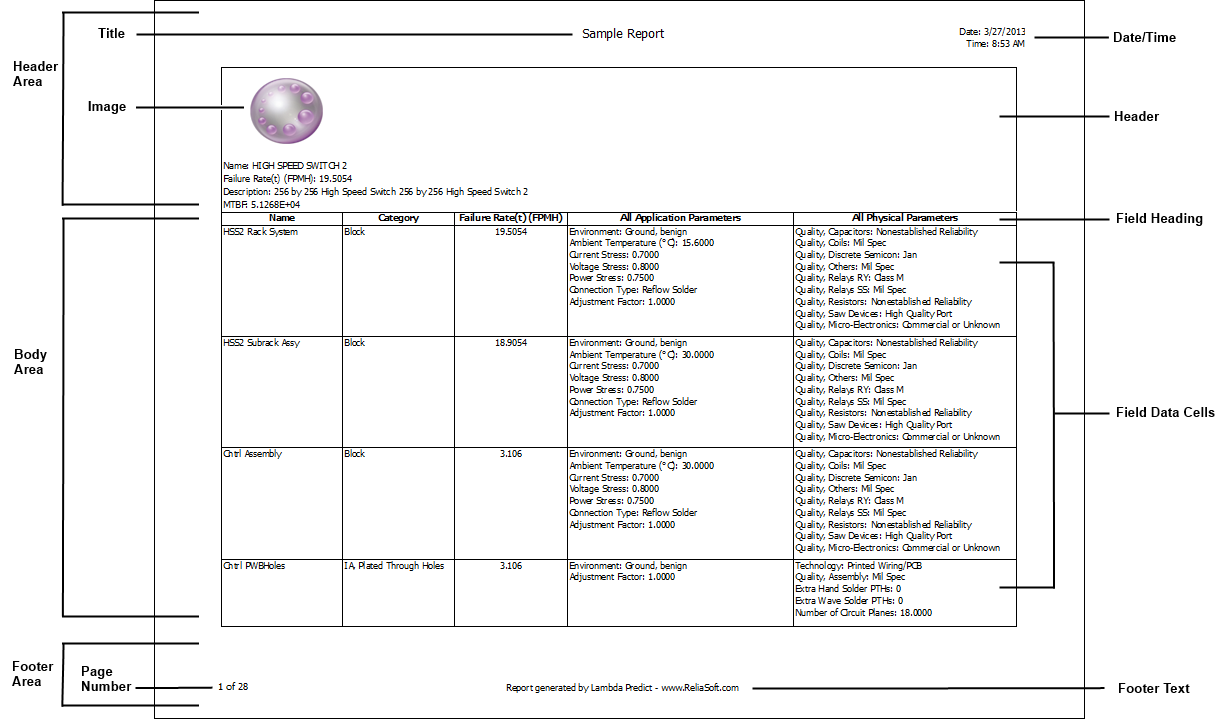
The following picture shows the parts of a report that can be configured to meet your particular needs.
Use the Body tab and control panel to select and configure the fields that will be displayed in the table of the main body of the report.
Use the Header tab and control panel to configure the header that can be displayed at the top of the first page of the report, or at the top of each page in the report. This includes the ability to select specific data fields (e.g., name, part number, predicted failure rate, etc.) to be shown in the header area.
Use the Footer page in the control panel to configure the footer that will be displayed a the bottom of every page in the report.
If desired, you can also use the Plots page in the control panel to select plot graphics to be inserted into the report document. For reports created in Excel, the individual plots will be placed on separate worksheets within the same Excel file. For reports created in Word, the individual plots will be separated by section breaks.
The rest of this topic discusses the formatting and other options available in the Body, Header, Footer and Plots pages of the control panel. For specific instructions about how to select data fields on the Body or Header table, see Selecting Fields for the Report Template.
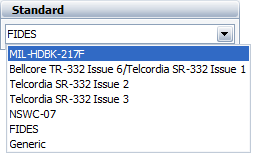
Use the Standard field to specify the type of standard item (e.g., Generic, MIL-217, etc.) that this report template is applicable for. This cannot be changed when you are editing an existing template (predefined or user-defined).
Use the Data Range drop-down list to select what data will be included in the report: blocks, components or both.
Use the Field Heading field to specify a different column heading for the selected field, if desired. By default, this will be the same as the field name. This can be different for each field. Click the Set Font icon, ![]() , to set the font type, style, size and color of the field that is currently selected.
, to set the font type, style, size and color of the field that is currently selected.
Use the Field Width options to specify how the column width will be set for the selected field: fit the text in the column heading, the widest data value in the column, the widest text value in the column (either heading or data) or a specified width. This can be different for each field.
Use the options in the Colors area to change the colors used for the field header and field data cells.
Tip: You can apply the same field heading font, field width and fonts, and data cell colors to multiple fields all at once by holding down the CTRL key while clicking each field of interest, and then clicking the Font icon, the Field Width drop-down list or the color options.
Use the Report Title field to specify the text to be displayed in the title of the report. This name will be placed in Excel's header field and will appear on every page of the printed report. Click the Set Font icon, ![]() , to set the font type, style, size and color of the report title and header. Note that because the report title is placed in Excel's header field, it is not visible on-screen when the Excel report is generated.
, to set the font type, style, size and color of the report title and header. Note that because the report title is placed in Excel's header field, it is not visible on-screen when the Excel report is generated.
Use the Header Options area to specify the vertical and horizontal position of the header, as well as the background color of the header area. Click the Set Font icon ![]() to set the font type, style, size and color of the report header fields.
to set the font type, style, size and color of the report header fields.
Select Include date/time to display a time stamp in the header region of the report.
Select Display on every page to include the header region on all pages of the report. If not selected, the header information will be shown only on the first page and only the report title and date/time, if selected, will be shown on every page.
Use the options in the Image area to specify the image, if any, that will be shown with the header information. You can click Browse to browse for your own image; None if you do not want any image to appear or Default to use the default Lambda Predict image included with the software.
Use the Footer Text and Options field to specify the text that will be placed in Excel's footer field and that will appear at the bottom of every page in the printed report. Click the Set Font icon, ![]() , to set the font type, style, size and color of the footer text. Note that because the report footer is placed in Excel's footer field, it is not visible on-screen when the Excel report is generated.
, to set the font type, style, size and color of the footer text. Note that because the report footer is placed in Excel's footer field, it is not visible on-screen when the Excel report is generated.
Select Include page numbers to display page numbers (in the "Page x of y" format) in the footer region of the report in Excel's footer field and that will appear on every page of the printed report.
In the Plot Type area select the plots that you want included with the report and, for each selected plot, use the Plot Style drop-down list to specify whether you want the plot to display as a bar chart or as a pie chart. (Note that for some FIDES reports, bar chart is the only option.)
© 1992-2015. ReliaSoft Corporation. ALL RIGHTS RESERVED.