
| Related Topics: | ||
The following information describes how to create, manage, edit or delete data from your own custom library files. For information on how to add components to a library and how to use the stored library data while working on a particular analysis, see Using Custom Library Files.
Note: Lambda Predict comes with two installed library files for your reference: PartsCount.lplib9, which is used for MIL-217 parts count predictions (see Using the Parts Count Method); and Library.lplib9, which contains component data that are available from your free access to PartLibraries.org (see Importing from PartLibraries.org). These two files are saved in the default documents folder for your computer (e.g., My Documents\ReliaSoft\Lambda Predict 9\Libraries).
To open the Manage Library window, choose System Hierarchy > Local Components > Manage Library.
![]()
In the Manage Library window, the address bar at the top of the window shows the location and name of the last library file that was accessed. You can use the icons in the field to browse for a different file or create a new library file (*.lplib9), as shown in the following picture. You can also open a file from a previous version of Lambda Predict (*.lplib).
By default, new library files are saved in the default documents folder for your computer (e.g., My Documents\ReliaSoft\Lambda Predict 9\Libraries), but you can choose to save the file to any location you desire.

The functions that you can perform on the library file depend on whether security has been enabled. If you created the library file, you can set up security permissions to allow or prevent other database users from editing your file. By default, your user account will be identified as that file's Admin account. As the Admin, you can choose to enable or disable the security setting of the file at any time by clicking the Enable Security or Disable Security button at the bottom of the window. Note that:
If you do not enable security, any database user can add/edit/delete/import component data from your file, so long as the file is saved in a location that they have read/write access to.
If you enable security, you can specify which user accounts can add/edit/delete component data from your library file. You can also give the role of Admin to other users. All other user accounts that do not have permissions for the file can still import component data from it so long as the file is saved in a location that they have read/write access to, but they will not be able to modify the contents of the file.
When you enable security, the Users tab, which shows the list of authorized users for the library file, will be available, as shown in the following example.
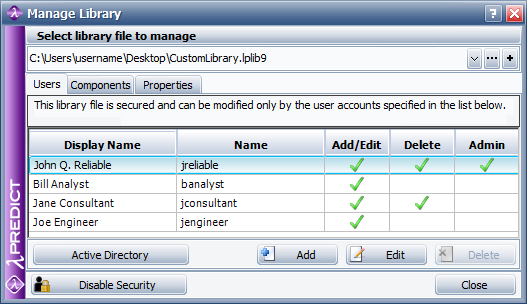
You can use the Add, Edit and Delete buttons below the table to manage the user accounts. You can also use the Active Directory button to import user accounts stored in the Microsoft Active Directory for the current domain.
Note: Library files can be used with any Lambda Predict database. This means that as long as the files are saved in a location that a user has access to, that user can import data (or modify the file if he has the permissions) from any database that he has access to. In addition, the library file security permissions are not related to the security permissions that might be set up in the database that you are working in. For instance, if you add a user account for a library file, that account has permissions for that library file only; it does not mean that the account gains access to the folio, project or database you are working in. (See Security Options for more information about database-level security.)
To view or edit the properties of a component that already exists in a library file, click the Component tab in the Manage Library window. Use the Component Type and/or Part Number search criteria to find the component you wish to edit, and then click the Search button, as shown in the following example.
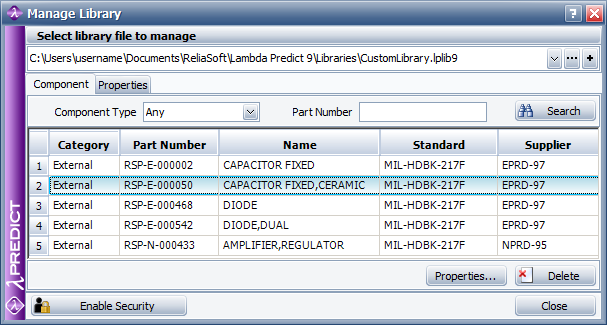
In the search results, select the component of interest and click the Properties button at the bottom of the window. The component's property fields will be displayed in the Properties tab. You can then edit any of the properties shown in the Properties tab, except for Part Number and Supplier, which are used to identify the component.
To delete a component from your custom library (or if your user account has the necessary permission to delete components from another user's custom library), use the Component tab to search for and select the component you wish to delete. In the search results, select the component of interest and then click the Delete button. There is no undo for deleting a component.
© 1992-2015. ReliaSoft Corporation. ALL RIGHTS RESERVED.